Thursday, December 31, 2009

Work Bench

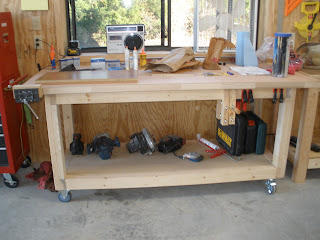
General how-to build a work bench information was found on the internet. Sam took those ideas and made this to suit his needs. He put casters on his so that he can move it where he needs it in the building.
Oops...here it is with the drawers.
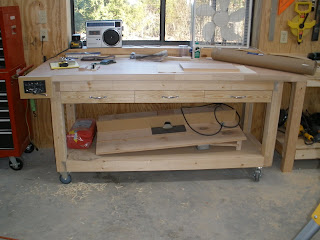
And that's the stowable router table. It clamps to the workbench and has legs on the sides. Remove the legs and stow it under the workbench.

Sunday, December 27, 2009

"Important" Room

The "important room." However, the sign is false advertising...cause there's only one...


Hot water too!


The finished building...

Wednesday, December 23, 2009

Interior

Then the husband and wife team of Sam and Sherry went to work on the interior. In 104 degree temps (with humidity factored in, it felt hotter 'n' hell) we installed plywood to the lower part of the interior to protect the surface of the insulation covering and to have a wall to hang stuff on. Sam did the majority of the work while Sherry wimped out in the house under the a/c.

The compound miter saw was borrowed from Elton.

Monday, December 21, 2009

It's a Start

The wife here...

I've bragged about my husband's accomplishments over on my blog but decided he needed his own blog for bragging rights.

October 2008 he started the groundwork for a metal building. 40' x 40' x 16'

Foundation poured

Building components delivered

In the spring of 2009, Sam with the aide of his brother (the men were 73 and 69 respectively at the time) erected the red iron framing. They had already built a 50' x 75' x 16' building on Elton's property doing everything but the roof insulation and sheeting.

Sam hired a crew from Ft. Worth to attach the insulation and sheeting to his entire building. The two men finished with the gutters and trim.